
While the kitchen table provided a nice platform for our builds, it was not the most convenient place to make a mess. Meal interruptions, legos falling from the table, and always having to setup and teardown before and after became somewhat cumbersome.
So I got an idea to build a Lego Table for the playroom. I searched the internet for ideas, and most people went the way of expedience and turned a nightstand or coffee table into a lego table by just gluing a baseplate down and calling it done. The lack of genuine lego tables out there left me convinced that I needed to design and build it from the ground up myself.
I started with a simple design and modeled it in 3D with SketchUp. I spent two weeks modifying and refining it until I finally concluded with this:
 |
| Lego Table |
 |
| Leafs are completely removable for use elsewhere |
 |
| Reversible top for general purpose play table |
Final Result
 |
| Lego side w/lego sorting & storage shelves underneath |
 |
| "all purpose" side |
 |
| Wood marble blocks |
How to Build It
This is a fairly simple table to build. No custom or expensive tools needed (although if you have them it will make some cuts easier). I will show you how I did it with just the items listed below.
Note: I provide all the measurements you'll need in the instructions below, however you may want to refer to my SketchUp model for more details.
What You'll Need
- Wood
- 1/2"x24"x48" (x2) - Solid pine panel, these are the two table top leafs.
- 2"x4"x8' (x3) - Legs and inner frame. I used premium whitewood studs (well sanded)
- 2"x3"x8' (x2) - Outer frame support (for rigidity).
- 1/2" quarter round (8')
- Table saw (preferred) or circular saw (what I had), for cutting 2x4's.
- Jig saw or hand saw, for cutting corner insets of table top
- Drill
- 2 1/2" wood screws
- For finishing, you'll likely want to sand, stain, and seal with polyurethane
Step 1 - Cut the table top corner insets
 |
| I clamped a piece of wood to use as a guide rail for the jigsaw to make a nice straight cut. |

 |
| The two leafs joined together, left to right |
Step 2 - Cut and glue quarter round trim
You will cut 1 long piece, and 2 short pieces for each leaf. The long piece will go along the longer edge between your corner inset cuts. The short pieces will go on the short edges from your corner inset cuts to the end of the board.
The long ones should be 45", and the short ones should be 20 1/2", but they may vary depending on the accuracy of your corner inset cuts (so measure your boards first).
 |
| Quarter rounds cut to leaf edge lengths |
Glue each piece down with wood glue and let dry overnight. Mine had a slight bow in them so I used clamps to hold them in place while the glue dried.
Once you have your quarter rounds glued down, your table top should look like this (I put the lego plates on there just to get a feel for it, they have not yet been glued down).
 |
| Table top with quarter rounds glued down |
Step 3 - Sand table top
Sand the two leafs well, using medium to light sand paper (100-220 grit). Be sure to round off sharp edges ('cause you know, someone will fall into the table...some day!).
 |
| Round off sharp edges with sand paper |
Step 4 - Stain and seal table top
Stain the two leafs. If you want to wait and do all your staining at the same time, you can hold off on this until you finish the frame (step 9). I chose to finish the leafs first so I could let it cure for a few days while I built the frame, which had to happen before I could glue the lego plates down.
 |
| I used Rustoleum wood stain "Summer Oak" (1 coat) |
 |
| 3 coats of Rustoleum Polyurethane (Satin) |
Once that's done, your table top will have a beautiful finish.

Step 5 - Cut inner frame pieces
Cut 4 pieces of 2x4, each 45" long. This length may vary slightly, depending on the cuts for your corner insets on your table top. So measure first!
 |
| I used a triangle and the attached laser to guide the cut |
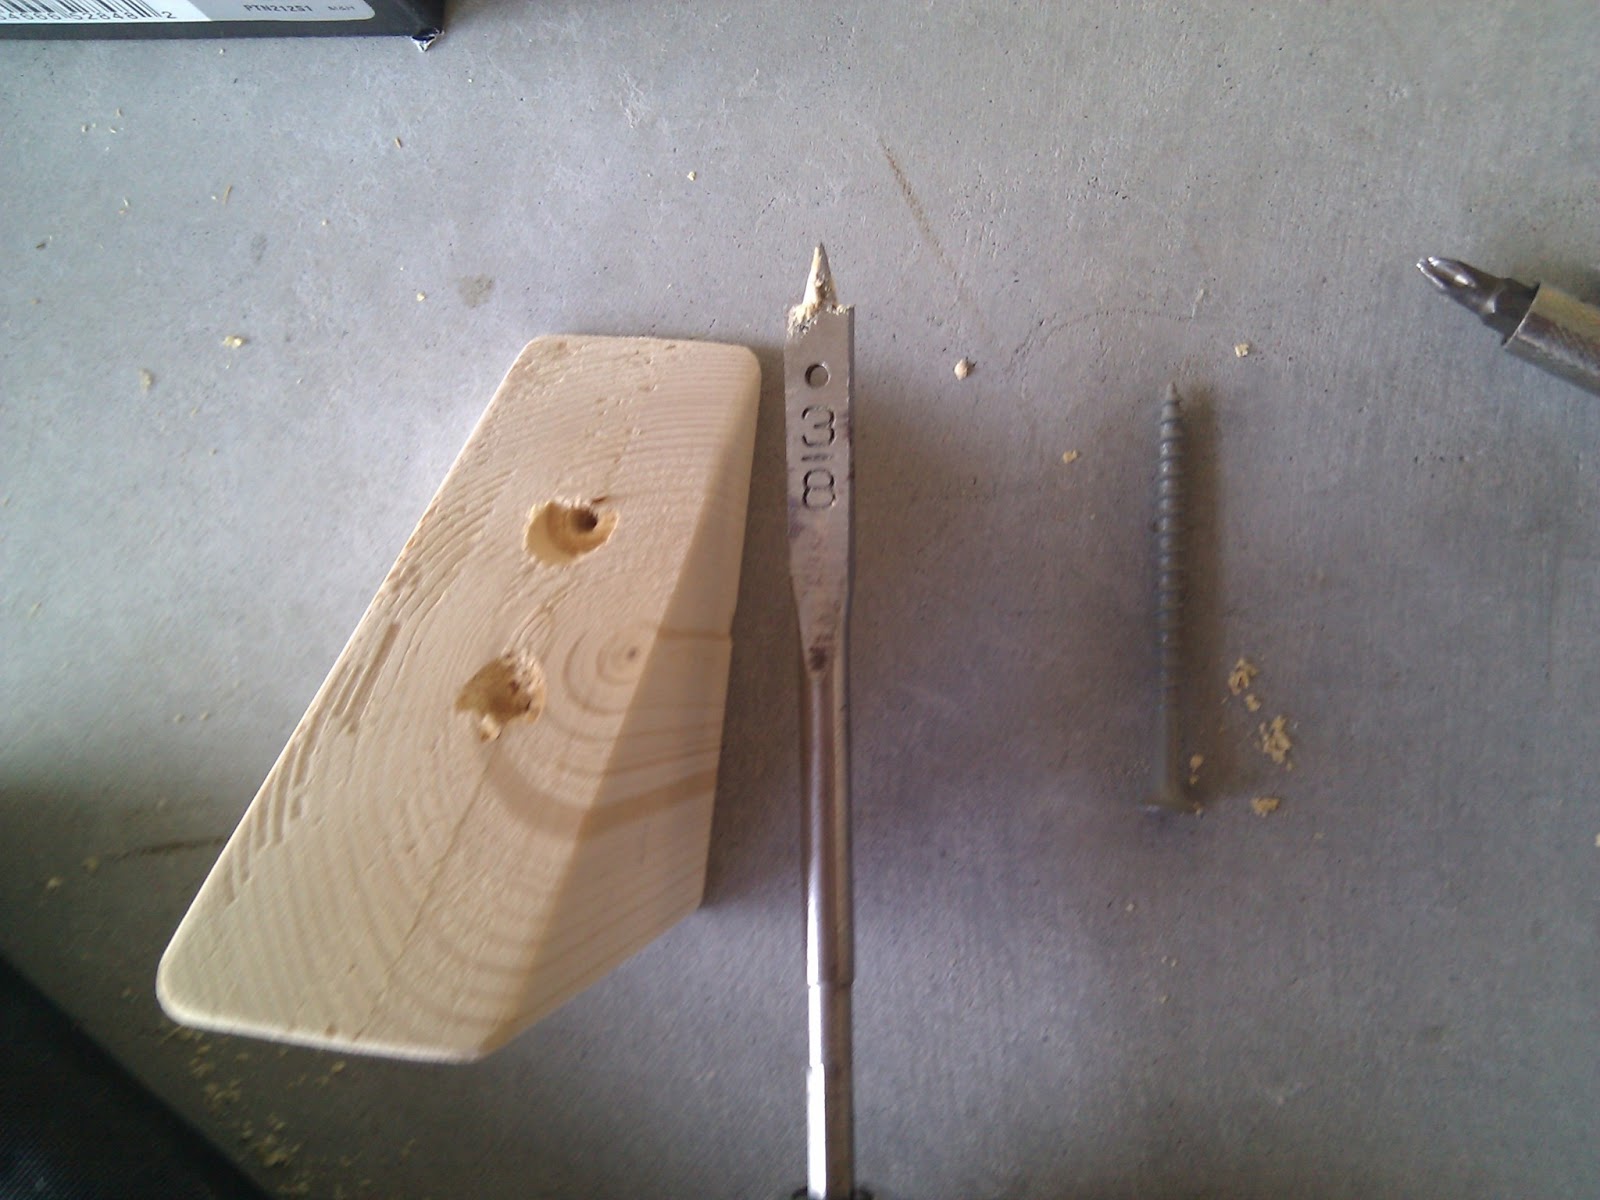
Then cut a corner out of each end measuring 1 3/4" (w) x1 1/2" (l) so that your 4 pieces join together "Tetris style".

 |
| It helped me to label the matching corners so I could keep track of which end goes where |

It doesn't matter which piece you choose to go on "top", but both ends of that piece should be on the same side (ie, both on top, or both on bottom) as depicted in the model. So you should have two top pieces, and two bottom pieces, opposite each other.

Step 6 - Screw frame to legs
This is the trickiest part. Pre-drill all screws to help prevent splintering!
Once you have the frame cut (but not secured together yet), lay your table top on top of it and place the legs snug into the corner insets. This will tell you exactly where the frame needs to be secured to the legs.

Center the frame so that an equal portion of the frame touches all four legs. Mark the legs vertically where the frame stops, and horizontally at the top of the quarter round trim (should be about 2" in, and 1 1/4" from the top to accommodate the quarter round trimming).

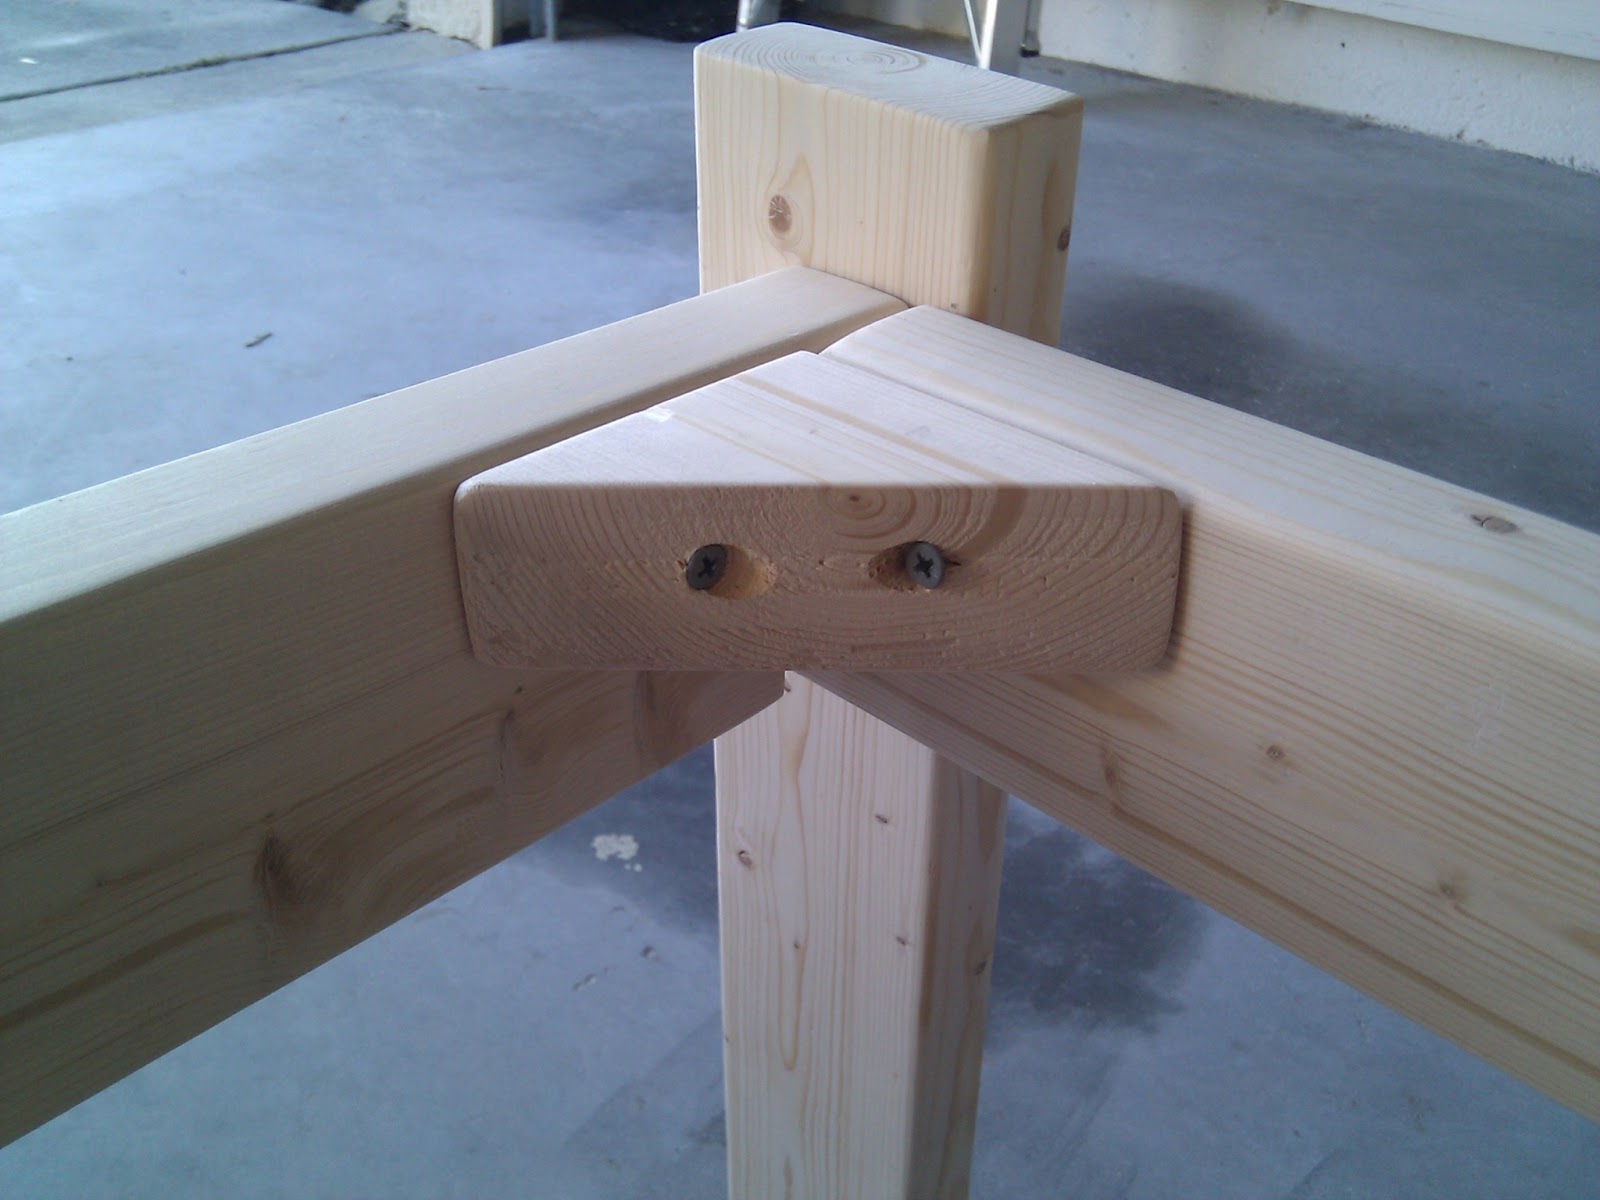
Screw the frame to the leg (as you can see in the model above). It should be able to rotate just a bit, that's OK we will secure the rotation later.
Once you have one side of the frame screwed down to two legs, do the same for the opposite side of the frame.
Then stand up all four legs and rest the last two pieces of the frame on top of the "T" junction. This is a little tricky to do by yourself, so I enlisted the help of my saw horses.
 |
| Saw horses help support the frame to stand up while I screwed the final two beams. |
Then I used my clamps to hold the "T" junctions together as I went around and screwed the other two beams into place.
 |
| I placed a single screw through the top half of the intersection |

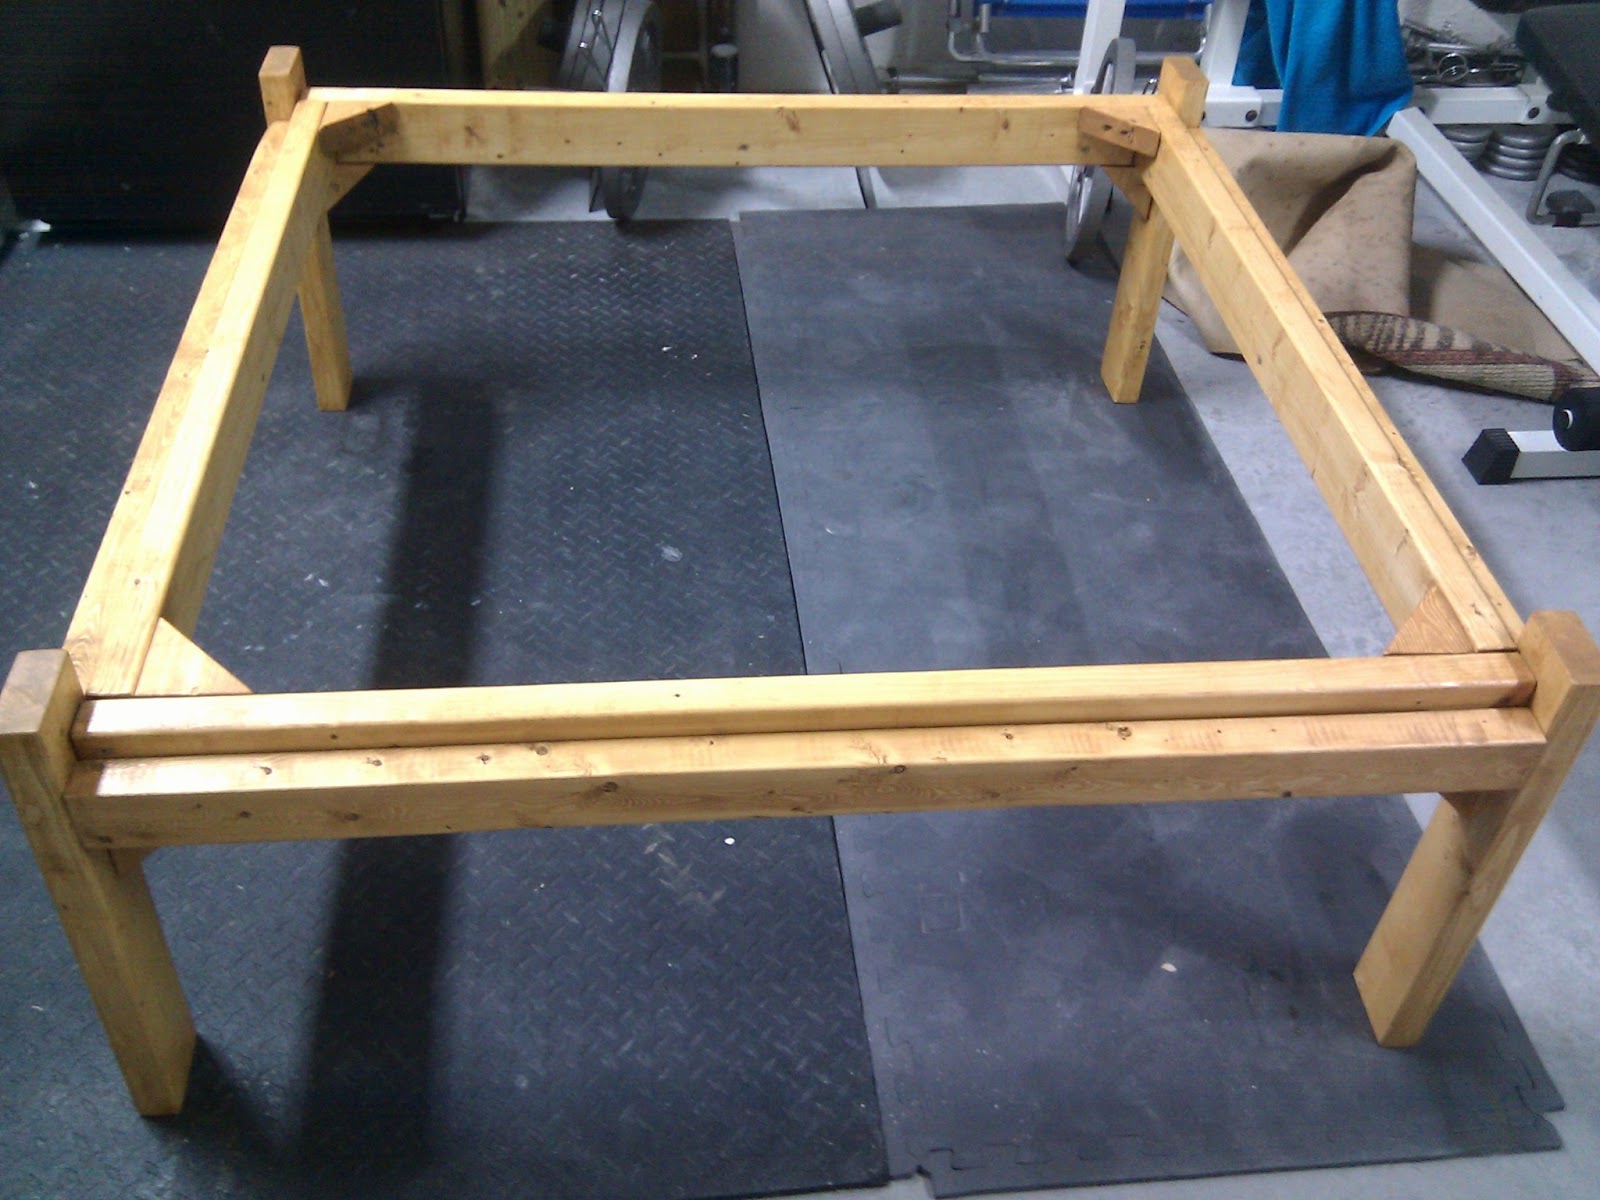
At this point, your frame should stand on its own. However, it will be a little wobbly so in the next step we will add some rigidity to it.
 |
| A slightly wobbly "inner" frame |
Step 7 - Adding support wedges
First, we will provide some wedges under the frame to help support the load, and some wedges in the frame corners to keep its "squareness". From the remaining length of the 2"x4"s, cut 8 triangles. They don't need to be exact, just that they form a right angle.
 |
| I also sanded these, and rounded the edges a little |
(Optional) Using a 3/8" drill bit, drill 2 countersink holes for your screws, one perpendicular to each axis. This helps hide the screws.
Secure a wedge in each of the 4 corners inside the frame, using 2 screws (1 for each board being attached to).
Once all frame wedges are in place, flip the frame upside down and secure the load bearing support wedges.
 |
| I didn't take a picture of this as I was doing it, so here's the model |
Turn the frame right-side up again.
Step 8 - Securing the frame
Now we will add the final support beams to the outside of the frame. This will make the base extremely rigid, and able to withstand all the leaning/pushing/moving you might do to the table.
Measure and cut 4 pieces of your 2"x3"s to fit snugly between the legs along the outside of the frame. It's important that these be a tight fit, as this is what will make the frame strong. If they are too short, they won't do any good. So it's better to cut them a little long and sand the ends down to size.
 |
| The 2"x3"s should fit very tight, and not require any screws to stay in place |
Drill 3 screws from the inside of the frame, through the inner 2"x4" and into the outer 2"x3".

Once you have all four sides secured snugly, you're done with the construction! You should now have a nice, strong base for your table.

Step 9 - Stain and seal frame
Stain and seal the frame (as you did to the table top in step 4).
 |
| 1 coat "Summer Oak" stain, 3 coats polyurethane |
Step 10 - Glue Lego base plates
I used contact cement to glue down my 4 large (15"x15") lego base plates and it work very well. Those plates are not coming off. I did try wood glue the first time, and they peeled right off. A word of caution, be careful to not use excessive amounts in one spot or it may warp your lego plates.

I hope you enjoy building your lego table, as I did. The excitement and surprise it brought to Bradley and Kevin when they first saw it is a true joy for a dad.

-Justin
You have definitely found a second calling. :)
ReplyDelete